Author: nante

  • What Can Cause a Fridge to Stop Being Cold? (And Why It’s Rarely Freon)

    What Can Cause a Fridge to Stop Being Cold? (And Why It’s Rarely Freon)

    Why Is My Fridge Not Cooling? A Technician’s Step-by-Step Diagnostic Guide

    When your refrigerator stops cooling, panic sets in fast. Food starts thawing, warm air spills out every time you open the door, and the fear of a massive replacement bill kicks in. Most homeowners immediately assume the worst: the sealed cooling system died, the refrigerant leaked out, or it is time to buy a brand-new appliance.

    The reality is that refrigerators rarely fail silently or without a simple, logical reason. Before you start shopping for a replacement, you need to understand how these systems actually operate and where the breakdown usually happens.

    The Very First Thing to Check: Airflow and Defrost

    When a refrigerator is running—meaning you can hear a gentle hum—but the food inside is spoiling, the issue almost always comes down to air movement and temperature distribution. Cold air is generated inside the freezer compartment and pushed into the fresh food section by a small fan. If that circulation stops, your fridge warms up fast.

    Step 1: Feel for Air Movement

    Open the fresh food compartment and feel near the vents. Is cold air actively blowing? If you hear the compressor running at the back of the unit but feel zero air movement, you are dealing with a circulation failure.

    Step 2: Check the Evaporator Fan

    Listen closely near the freezer’s back wall. The evaporator fan is responsible for pulling cold air off the coils and pushing it through the vents. If this fan is silent, jammed, or worn out, cold air remains trapped in the freezer while your fresh food rots.

    Step 3: Inspect the Back Wall for Heavy Frost

    Take a look at the back wall inside the freezer. Do you see a heavy layer of frost or ice buildup? If so, your automatic defrost system has failed. When the defrost heater, thermostat, or control board fails, ice builds up over the evaporator coils until air can no longer pass through them.

    Step 4: Check the Condenser Coils and Thermostat

    Feel the airflow near the bottom or back exterior of the fridge. If the condenser coils are caked in thick dust, the unit cannot release heat, causing the entire cooling process to stall. Finally, verify that someone did not accidentally bump the thermostat control settings to a warmer temperature.

    The $2,500 “Dead Compressor” That Wasn’t

    Replacing a warm refrigerator prematurely is an expensive mistake many homeowners make. I once responded to a call from an anxious homeowner whose high-end unit had completely quit cooling. A salesperson at a big-box store had already convinced them the sealed compressor system was shot, recommending a $2,500 new fridge instead. When I got on-site, I started with basic diagnostics by sliding the appliance out to inspect the wiring and outlet. Tucked behind the thick baseboards was a standard GFCI receptacle.

    The outlet had simply tripped.

    Resetting the GFCI restored full power to the refrigerator immediately. The compressor kicked on, the fans started spinning, and the unit was cooling normally within minutes. A minor electrical surge had caused a temporary trip, turning a potential $2,500 appliance purchase into a zero-parts fix. Always verify basic power sources before accepting a costly diagnosis.

    The Biggest Diagnostic Mistake DIYers Make

    The most common misconception in appliance troubleshooting is assuming that a warm fridge means a refrigerant leak. Homeowners and inexperienced technicians often jump to the conclusion that the unit needs “Freon” or a system recharge, and they immediately reach for piercing valves or recharge kits.

    In reality, modern refrigerators are factory-sealed systems. They do not burn through or consume refrigerant like fuel. If a sealed system loses its charge, there is a physical breach in the tubing that requires specialized recovery, soldering, and vacuum purging to fix correctly.

    Refrigerant leaks account for a tiny fraction of cooling complaints. The vast majority of cooling failures stem from simple, mechanical, or maintenance-related issues:

    • Defrost system failures (defrost thermostat, heater, or control board)
    • Heavy dust and pet hair clogging the condenser coils
    • A failed evaporator fan motor
    • A faulty start relay on the compressor

    Pumping extra refrigerant into a system with a dead fan or frozen coils will not fix the problem; it will over-pressurize the compressor and destroy a perfectly good component.

    Preventative Maintenance: Cleaning Your Condenser Coils

    If you want to avoid sudden cooling failures and extend the lifespan of your appliance, regular coil maintenance is non-negotiable. Condenser coils dissipate the heat removed from inside your fridge. When they get coated in dust, hair, and grease, the compressor works twice as hard, runs hotter, and eventually overheats or fails.

    Recommended Maintenance Schedule

    • Standard homes: Clean the coils every 6 months.
    • Homes with pets or high dust levels: Clean the coils every 2 to 3 months.

    How to Clean Your Coils Step-by-Step

    • Unplug the refrigerator from the wall outlet for safety.
    • Locate the coils. On most modern units, they are located behind the bottom front toe-grille panel or behind an access panel on the lower back of the unit.
    • Remove loose debris using a vacuum equipped with a narrow brush attachment.
    • Use a flexible coil cleaning brush to gently scrape away stubborn dust clinging between the metal fins.
    • Wipe down the surrounding area with a damp cloth or specialized appliance cleaner.
    • Reinstall the grille cover, push the unit back, and plug it back into the outlet.

    The Reality of Modern High-Tech Refrigerators

    When buying a new refrigerator, it is easy to get drawn in by sleek touchscreens, dual evaporators, and linear compressor technology promising maximum energy savings. However, there is a clear trade-off between modern convenience and long-term durability.

    Simpler, Traditional Units

    Older, simpler refrigerators were built with straightforward mechanical controls, single compressors, and minimal electronics. These units routinely last 15 to 20 years. When they do break down, the replacement parts are inexpensive, widely available, and quick to install.

    Modern High-Tech Units

    Modern feature-packed refrigerators trade long-term reliability and straightforward repairs for energy efficiency and added convenience. Complex computer boards, multiple sensor arrays, and intricate sealed systems make these units far more vulnerable to voltage spikes and electronic component failures.

    Many high-tech models experience major failures within 5 to 10 years. Repairs are frequently expensive due to complex diagnostic processes and frequent supply-chain delays for proprietary electronic parts. When shopping for your next unit, weigh the value of smart connectivity against the proven reliability of a simpler mechanical design.
  • Common Sub-Zero Refrigerator Problems (And How to Spot Them)

    Common Sub-Zero Refrigerator Problems (And How to Spot Them)

    Trouble With High-End Refrigeration: Common Sub-Zero Issues

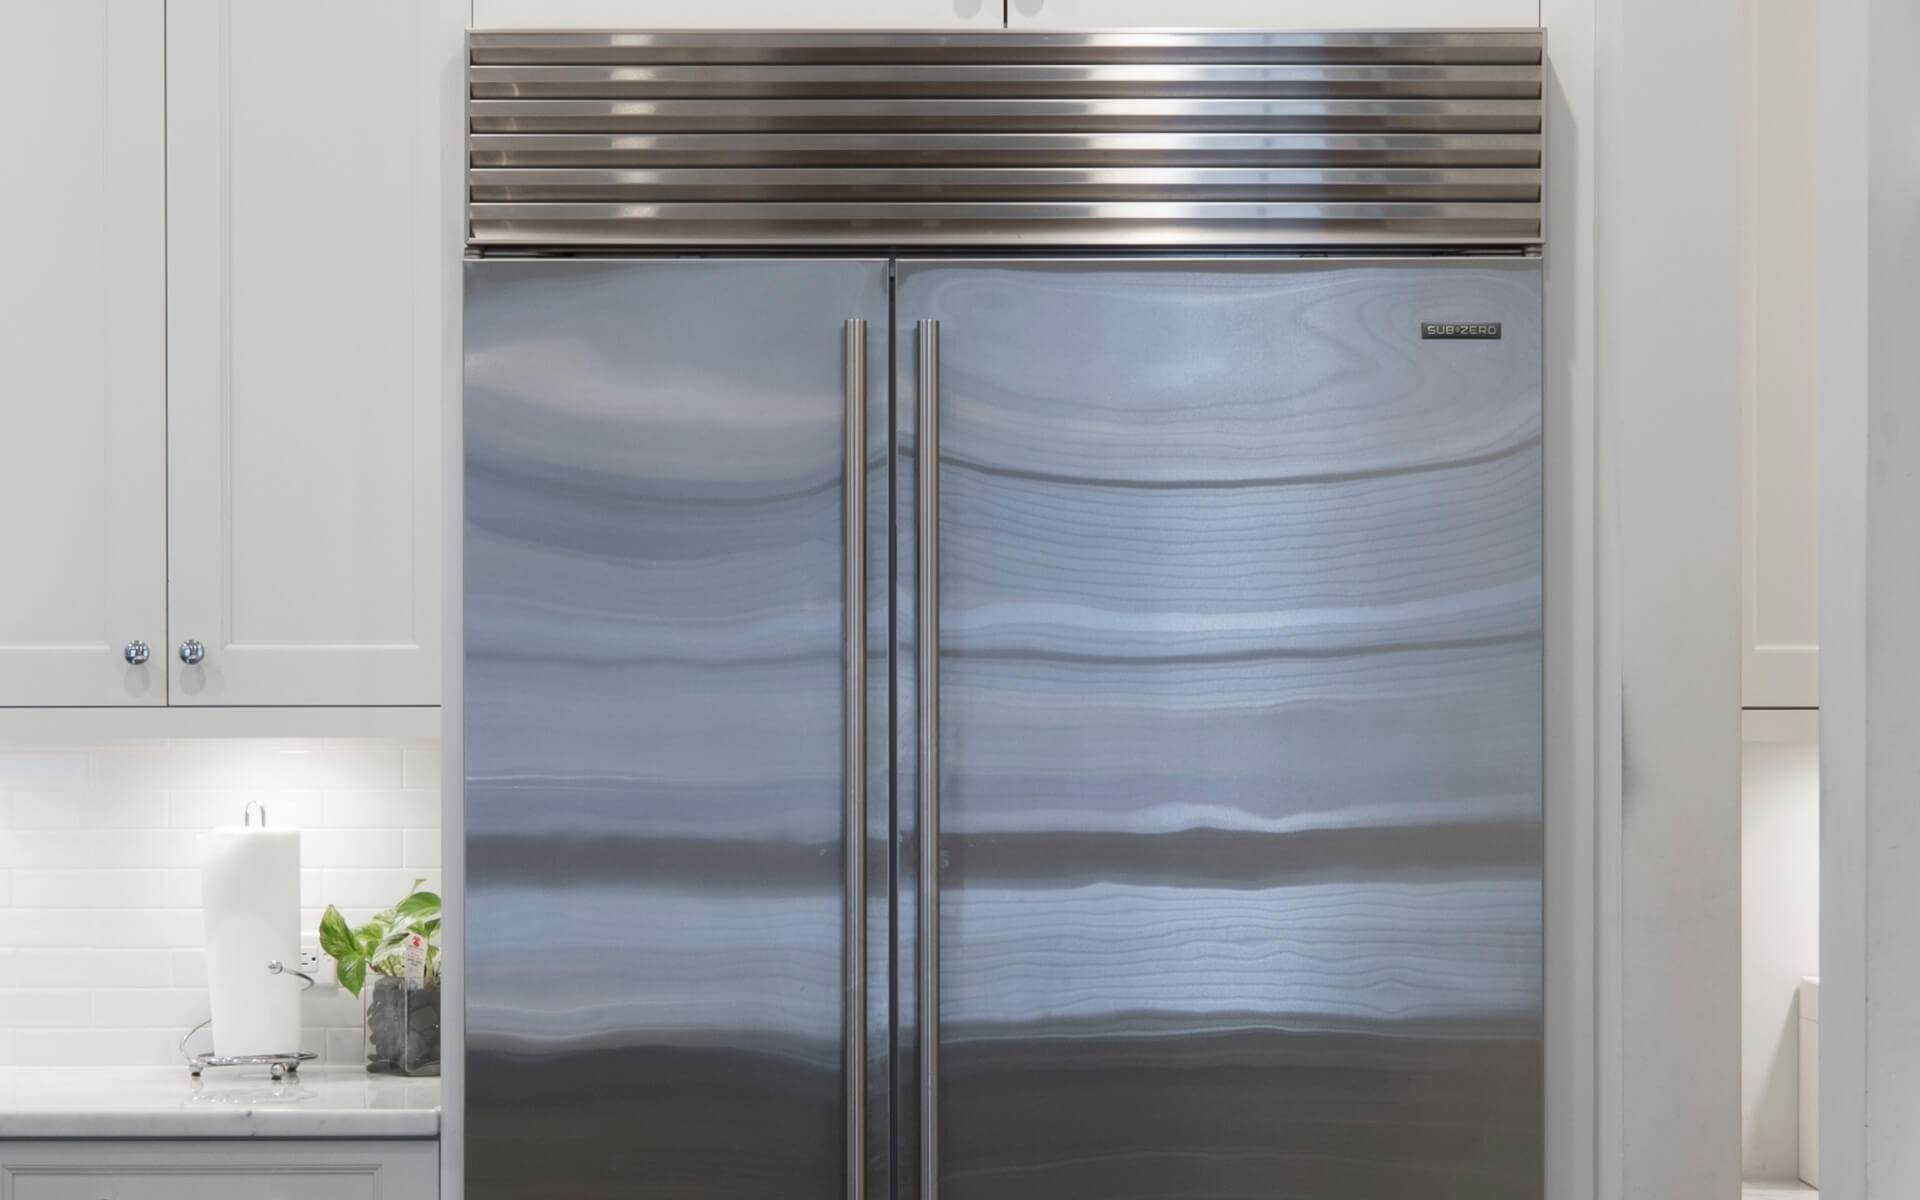
    Sub-Zero appliances are well-known for their heavy-duty build quality and long lifespans, frequently serving as the centerpiece of luxury kitchens. However, even these high-end machines are susceptible to wear and tear. A closer look at the typical problems owners face reveals the internal mechanics of these premium refrigerators and helps you spot early warning signs.

    Cooling System Malfunctions

    A refrigerator must maintain a stable, chilly climate to protect your food. When the temperature fluctuates, the appliance fails at its most basic task. Despite top-tier engineering, Sub-Zero refrigerators experience several recurring cooling failures.

    Inefficient Cooling or No Cooling at All

    Discovering that your refrigerator is warm inside is incredibly frustrating. Several common component failures typically cause a loss of cooling power.

    Condenser Coil Contamination

    Condenser coils shed the heat collected from inside the appliance into the surrounding room. When these coils are ignored, they gather thick layers of dust, pet hair, and airborne debris. This buildup acts as an insulation blanket, trapping the heat and forcing the compressor to work continuously. Over time, this extra strain drops the unit’s efficiency and can trigger a total cooling breakdown. Keeping these coils clean is essential for the longevity of the appliance.

    Evaporator Fan Motor Failure

    The evaporator fan motor circulates chilled air throughout the freezer and refrigerator sections. If this motor gets stuck or runs erratically, cold air will not circulate evenly. A failing fan motor often gives a warning by humming or buzzing before it stops completely. Without proper airflow, you will notice warm pockets in some zones while other areas stay cold.

    Faulty Thermistor or Temperature Sensor

    The thermistor reads the internal temperature and reports back to the main control board. If this sensor breaks down, the refrigerator miscalculates its own internal environment, causing the compressor to cycle incorrectly. A broken thermistor can force the compressor to run nonstop, freezing your food, or prevent it from running enough, letting temperatures rise. Fixing this requires checking the sensor’s resistance with specialized diagnostic tools.

    Refrigerant Leaks

    Refrigerant absorbs and releases heat as it moves through the cooling loops. While leaks are rare in Sub-Zero models due to their thick tubing, they can still develop at joints or from physical impacts. A slow drop in cooling performance, sometimes paired with faint hissing noises or oily spots near the lines, points to a leak. Resolving this requires a professional technician to find the breach, seal it, and refill the system.

    Excessive Frost Buildup

    A tiny bit of frost in the freezer is normal, but heavy ice accumulation blocks airflow and takes up valuable storage space.

    Defrost System Malfunction

    Sub-Zero units use automated defrost cycles to melt away ice accumulation on the evaporator coils. This setup relies on a defrost heater, a thermostat, and a drain line. If the heater burns out, the ice builds up continuously. If the drain path gets plugged, the melted water backs up and refreezes into a solid block.

    Door Seal Issues

    Gaskets keep the appliance airtight. When these rubber seals split, tear, or harden with age, warm and humid kitchen air slips into the freezer. This moisture quickly turns into thick frost. You can check the seal by closing the door on a piece of paper; if it pulls out easily, the gasket needs to be replaced to prevent outside humidity from getting inside.

    Icemaker and Water Dispenser Problems

    Built-in icemakers and water dispensers provide great everyday convenience, but they are frequent sources of mechanical trouble.

    Icemaker Not Producing Ice

    A broken icemaker is highly inconvenient, especially during the summer months.

    Water Inlet Valve Malfunction

    The water inlet valve opens electronically to send water into the icemaker. If hard water minerals clog the valve or the internal solenoid fails, water cannot fill the ice mold. You might hear a buzzing sound from the back of the refrigerator when the machine tries to call for water but fails due to a blockage.

    Clogged Water Filter

    The built-in water filter purifies the water for both ice and drinking. These filters fill up over time. When a filter is completely blocked, water pressure drops significantly, stopping ice production entirely. Many seemingly complex water issues can be fixed by simply swapping out a dirty filter.

    Faulty Icemaker Module

    The icemaker module uses a network of small gears, motors, and switches to manage the ice cycle. A mechanical failure here can stall the entire process. The machine might try to harvest ice that isn’t there, or fail to drop the cubes it just froze. Over time, these moving parts naturally wear down and require replacement.

    Low Water Pressure

    Sometimes the issue stems from your home plumbing rather than the refrigerator itself. If the incoming water line doesn’t have enough pressure, the icemaker cannot fill completely. A technician can use a pressure gauge to determine if the household plumbing is the true culprit.

    Water Dispenser Issues

    Water dispensers face identical supply challenges, usually manifesting as leaks or poor flow.

    Leaks from the Dispenser

    A dripping water dispenser can ruin flooring and cause mold growth. Leaks typically stem from brittle dispenser tubing, a water inlet valve that fails to shut completely, or a worn actuator switch. A slow drip usually points to an aging seal, while a steady stream means the valve is stuck open.

    Slow or No Water Flow

    When water only trickles from the dispenser, the cause is usually a clogged filter, a restricted inlet valve, or a frozen water line. Any restriction in the water line will severely limit the flow rate.

    Door Seal and Alignment Problems

    Tight seals are necessary to keep utility bills low and temperatures stable. Sagging doors or worn rubber allow heavy thermal transfer, forcing the refrigerator to work double time.

    Poor Sealing and Air Leaks

    An unsealed door lets cold air escape while pulling in warm air, which spoils food faster and wastes electricity.

    Worn or Damaged Gaskets

    Refrigerator gaskets lose their flexibility and become brittle over the years. Keep an eye out for visible cracks, warped spots, or sections where the magnet fails to grip the metal frame. The resulting air leaks force the compressor to run constantly, raising your energy costs.

    Misaligned Doors

    Even precisely engineered doors can shift due to poor installation or uneven flooring. If the doors sit crooked, the gaskets will not seal evenly, creating hidden gaps. Overloading the door bins with heavy items can also cause the hinges to sag over time. Adjusting the leveling legs or tightening the hinges usually restores the alignment.

    Door Not Closing Properly

    Mechanical issues and physical blockages can also prevent the door from sealing shut.

    Obstructions in the Door Path

    Often, oversized food containers or items in the door shelves stick out just enough to keep the door from closing completely. Loose food wrappers or ice buildup along the frame can also act as physical blocks. A quick reorganization often fixes the issue without a repair visit.

    Faulty Door Closers or Hinges

    Many Sub-Zero models use spring-assisted hinges to pull the door shut automatically. If these springs snap or dry out, the door may stay slightly open or bounce back when pushed. Creaking noises or physical stiffness indicate that the hinges need to be replaced.

    Noise-Related Complaints

    Refrigerators are rarely silent, but new or loud noises usually mean a component is struggling. Sub-Zero units are insulated for quiet operation, making odd sounds easy to notice.

    Unfamiliar or Excessive Operating Sounds

    New sounds warrant investigation before they turn into major mechanical breakdowns.

    Compressor Issues

    A failing compressor often generates distinct warning sounds. You might hear a loud grinding or rattling from worn internal parts, or a loud, constant hum from an electrical fault. A compressor working extra hard due to dirty condenser coils will also run noticeably louder.

    Fan Motor Noise

    The bearings inside the evaporator and condenser fan motors wear out over time, creating high-pitched squealing, screeching, or clicking noises. Loose fan blades hitting ice or loose debris will also cause a steady tapping sound. A broken fan stops proper air movement, hurting cooling performance.

    Vibrations from Loose Components

    Not all noises mean a part is broken; sometimes a loose screw or panel simply vibrates against the metal frame. Minor tremors can amplify into loud rattles over time. Checking the back and bottom panels for loose mounting screws can often silence these annoying buzzes.

    Gurgling or Hissing Sounds

    Certain noises are a completely normal part of everyday operation, even if they sound concerning at first.

    Refrigerant Flow Noise

    It is perfectly normal to hear occasional bubbling, gurgling, or hissing. This is simply the sound of the refrigerant changing from liquid to gas as it flows through the internal tubing.

    Drain Pan Evaporation

    During a defrost cycle, melted ice flows down into a pan located beneath the warm compressor to evaporate. You may hear a light sizzling or dripping sound as the cold water hits the warm pan. This means your self-defrosting system is working exactly as it should.

    Electrical and Control Board Failures

    Modern Sub-Zero units rely on complex electronics to coordinate the cooling cycles. When these brains fail, the refrigerator can behave erratically or stop working entirely.

    Unit Not Powering On or Intermittent Power

    A refrigerator that loses power puts all your groceries at risk of spoiling.

    Faulty Power Supply or Outlet

    Before replacing expensive parts, look at the wall outlet. Tripped circuit breakers, blown fuses, or loose power plugs can cut power instantly. Testing the outlet with another small appliance helps rule out basic household electrical issues.

    Main Control Board Failure

    The main control board manages all the sensors, fans, and cycles. If a power surge or wear and tear over time damages this board, the refrigerator will behave erratically or shut down completely. Signs of a broken control board include flickering display lights, wild temperature swings, or a totally unresponsive unit.

    Damaged Wiring

    Over many years, internal wires can fray or corrode from constant vibration and moisture. While rare, a broken wire will stop electrical signals from reaching vital components like the compressor or fans.

    Lighting or Display Malfunctions

    Lighting and display bugs do not affect cooling performance, but they ruin the premium user experience.

    Burnt-Out LED Lights

    Sub-Zero models use long-lasting LED strips to light up the interior. However, these diodes can still fail due to bad circuitry or loose wire connections.

    Faulty Display Panel

    The external control panel lets you adjust temperatures and monitor settings. If the screen flickers, displays garbled characters, or stops responding to touch, the control board or its data cable is failing.

    Understanding these common failure points helps you protect your appliance investment. Simple upkeep, like clearing away dust from the coils and changing the water filter on time, keeps these high-end refrigerators running reliably for decades.

  • Should You Repair or Replace Your Refrigerator?

    Should You Repair or Replace Your Refrigerator?

    Is It Worth It to Repair a Refrigerator? The Honest Truth from a Pro

    When your refrigerator starts acting up, the sudden panic is usually followed by a tough question: Should you call a technician to fix it, or should you just start shopping for a new one?

    If you search the internet for an answer, most generic articles will tell you to follow the “50% rule.” This rule states that if the repair costs more than half the price of a new unit, you should replace it. In the real world, however, appliance decisions are rarely that black and white.

    Deciding whether a refrigerator is worth repairing depends heavily on its current condition, how long it has been working, and how well it has been maintained over the years. Here is a look at what truly matters when evaluating a broken fridge, and how to spot the hidden money pits.

    The Danger of the “Money Pit” Trap

    One of the automotive or appliance world’s biggest mistakes homeowners make is failing to see the big picture. When a refrigerator begins to fail, it rarely breaks down all at once. Instead, it nicks and dimes you over time.

    You might spend money to fix a minor sensor this month, thinking you saved cash. A few months later, a fan motor goes out. Constant repairs on a refrigerator accumulate so quietly that you end up spending significantly more money than you realize, rather than just buying a new one. Before you know it, you have spent enough to buy a brand-new, modern refrigerator, but you are still stuck with an old, unreliable machine.

    As a general framework, a refrigerator is absolutely worth repairing when it rarely calls for service. If it has been a reliable workhorse for years and suddenly needs a minor fix, repair it. But if the fridge requires multiple service calls, it is a sign that the components are failing one by one, and it is time to invest in a replacement.

    Red Flags That Mean It Is Time to Replace

    Age is just a number; the actual physical condition and maintenance history of the appliance dictate its true lifespan. Over years of working with appliances, there are several distinct deal-breakers that signal a refrigerator is a bad investment to repair, even if it isn’t that old.

    • Punctured Freezer Walls: If the freezer liner has been punctured and the refrigerant has escaped, moisture has likely entered the sealed system. This is almost always fatal for the unit.
    • Rusted Condenser Coils: When the coils on the back or bottom of the fridge are heavily rusted, the structural integrity of the cooling system is compromised.
    • Total Loss of Cooling: A refrigerator that completely loses its ability to cool often points to a major failure in the compressor or the sealed system, which is incredibly costly to fix.
    • Severe Dust Accumulation: A fridge buried in thick dust has been suffocating for years. This strains the vital components and shortens their lifespan dramatically.

    The Secret to Making a Refrigerator Last

    If your refrigerator does not have any of these fatal red flags and you decide to move forward with a repair, you want to ensure that investment lasts. The single best piece of advice to prevent ending up right back in the same situation a few months later is to focus heavily on maintenance.

    Once the repair is done, make it a priority to thoroughly clean the refrigerator and its surroundings. Dust, pet hair, and debris force the compressor and coils to work twice as hard to keep your food cold. By keeping the coils clean and ensuring the appliance has proper breathing room, you reduce the strain on the mechanical parts.

    Pristine, consistent maintenance is the ultimate way to make each individual part last longer. Prevention is always much cheaper than a technician’s visit, and taking care of the machine today ensures you won’t have to face the repair-versus-replace dilemma again anytime soon.

  • The Cost of Repairing Your Premium Refrigerator: What Homeowners Need to Know

    The Cost of Repairing Your Premium Refrigerator: What Homeowners Need to Know

    Is Your Premium Refrigerator Worth Repairing? Understanding the True Value of Professional Service

    When a high-end built-in refrigerator—like a Sub-Zero or Thermador—starts acting up, homeowners are often faced with an immediate dilemma: repair it, or replace it?

    In my years of serving premium appliance clients across South Florida, I’ve noticed a common misconception. Many assume that because all refrigerators essentially keep food cold, the repair process and costs should be the same as a standard model. However, high-end, premium appliances are built to different standards, and they require a different level of expertise to service.

    Why High-End Repairs Cost More

    It is important for homeowners to understand that premium appliances aren’t just “fancier” versions of ordinary fridges. They are complex machines requiring specialized parts and diagnostic tools. When you call for a repair, you aren’t just paying for the time the technician spends at your door; you are paying for the specialized knowledge required to handle these unique systems.

    The “First Impression” Matters

    For our clients, the repair experience starts the moment we arrive. Professionalism isn’t just a buzzword—it’s a requirement. My SOPs are built on the understanding that our clients deserve respect:

    • Professional Appearance: Our technicians arrive in neat, clean uniforms.
    • Home Protection: We use shoe covers to ensure your flooring remains pristine.
    • Tool Care: We maintain clean, organized tools—never messy or greasy—to show our respect for your property.
    • Respect for Your Space: After every job, we ensure the workspace is cleaned and everything is returned exactly as it was.

    The Convenience Factor

    In my experience, luxury homeowners are less concerned with comparing the exact dollar amount of a repair versus a replacement. Their primary concern is reliability and convenience. Purchasing, waiting for delivery, and installing a new built-in unit is a major disruption. Most clients prefer to repair their current unit because it is less hassle, provided they have confidence in the technician’s ability to get it done right the first time.

    Transparency Builds Trust

    Even though our clients can afford premium services, I believe in radical transparency. I always explain exactly why a repair cost what it does. I don’t charge “too much,” but I do charge for the quality, reliability, and peace of mind I deliver.

    The Real Cost of “Cheap”

    You can always find a cheaper repairman online, but the risk is rarely worth the reward. An inexperienced hand handling a complex, high-end appliance often creates more problems than they solve. That leads to disappointment, wasted time, and further expenses.

    At the end of the day, premium service isn’t just about fixing a mechanical issue. It is about being transparent, honest, and building the trust required when you enter someone’s home. High-fee service is simply the price of quality, reliability, and total peace of mind.

  • Stop the Guesswork: How to Know If Your Appliance is Worth Fixing

    Stop the Guesswork: How to Know If Your Appliance is Worth Fixing

    The Decision Process: Repairing vs. Replacing Your Appliances

    Every homeowner dreads the moment an appliance makes a concerning noise, stops heating, or fails to power on. Your first instinct might be to weigh the repair cost against the price of a new unit—the common “50% rule.” However, as an industry professional, I know that real-world appliance decisions are far more complex than simple math. To make the best choice for your budget, you must consider the quality of your appliance, the accuracy of the diagnosis, and the underlying cause of the malfunction.

    Why Premium Appliances Change the Equation

    Standard replacement advice often fails when applied to luxury, high-end brands. If you own appliances from manufacturers like Wolf, Sub-Zero, or Thermador, you should almost always choose to repair them rather than replace them.

    Protecting Your Investment

    Luxury brands represent a significant financial investment, offering superior engineering and longevity compared to entry-level models. In many cases, an older, premium-built machine is of higher quality than what is available on showroom floors today. Furthermore, replacing a built-in refrigerator or a commercial-grade range can cost thousands of dollars, potentially requiring expensive cabinetry modifications. Repairing these appliances is the smartest way to preserve a machine designed to last for decades.

    The Importance of Professional Diagnostics

    A malfunctioning appliance often appears beyond repair when in reality, it may only require an expert eye. A frequent error homeowners make is assuming a severe symptom necessitates a complete replacement.

    Avoiding Premature Replacement

    I recently assisted a client whose oven door became stuck following a self-clean cycle. While it appeared to be a catastrophic failure, a thorough test of the door lock mechanism revealed the latch was functioning perfectly. No parts were required, and we returned the appliance to service without an unnecessary repair bill or a premature replacement. Expert diagnostics can often identify simple fixes that save you from the cost of new parts or new equipment.

    Knowing When It Is Time to Replace

    While many machines can be saved, there are moments when further investment is unwise.

    Identifying the Breaking Point

    For a premium range, replacing a faulty igniter is a logical repair that extends the life of an excellent machine. However, if you are using an entry-level stove that has reached the end of its expected lifespan, that same igniter issue is a signal to move on. When the combined cost of professional labor and parts nears the price of a new, basic model, it is time to replace the unit.

    The Insider Secret: Check the Basics First

    Most general advice ignores the fact that many “dead” appliances are actually suffering from simple external issues rather than terminal mechanical failures. Before you decide your appliance is history, ensure these two critical elements are examined:

    Safety Switches and Airflow

    • The Switch: A large percentage of perceived failures are caused by tripped, misaligned, or faulty safety or door switches. If these switches do not maintain a clean connection, the machine will fail to operate.
    • Gas Vent Flow: For gas-powered appliances, proper airflow is vital. Blockages or restrictions in the vent can trigger automatic safety shutdowns, which perfectly mimic the symptoms of a major mechanical breakdown.

    By relying on expert diagnostics and performing these foundational checks, you can avoid discarding perfectly functional equipment and save your household from unnecessary expenses.